Installing your control unit correctly
Your repaired control unit comes back tested and with all vehicle data, and we deliver a replacement unit already coded to your vehicle. In both cases it is ready for use immediately after installation, and no coding or programming is needed. For it to work without faults in your vehicle, a few steps matter during installation.
- No coding needed
- All screws tight
- Check the pins
Safety notice: Work on airbag systems may only be carried out by trained specialist personnel. The notes on this page supplement the vehicle manufacturer's installation instructions; they do not replace them.
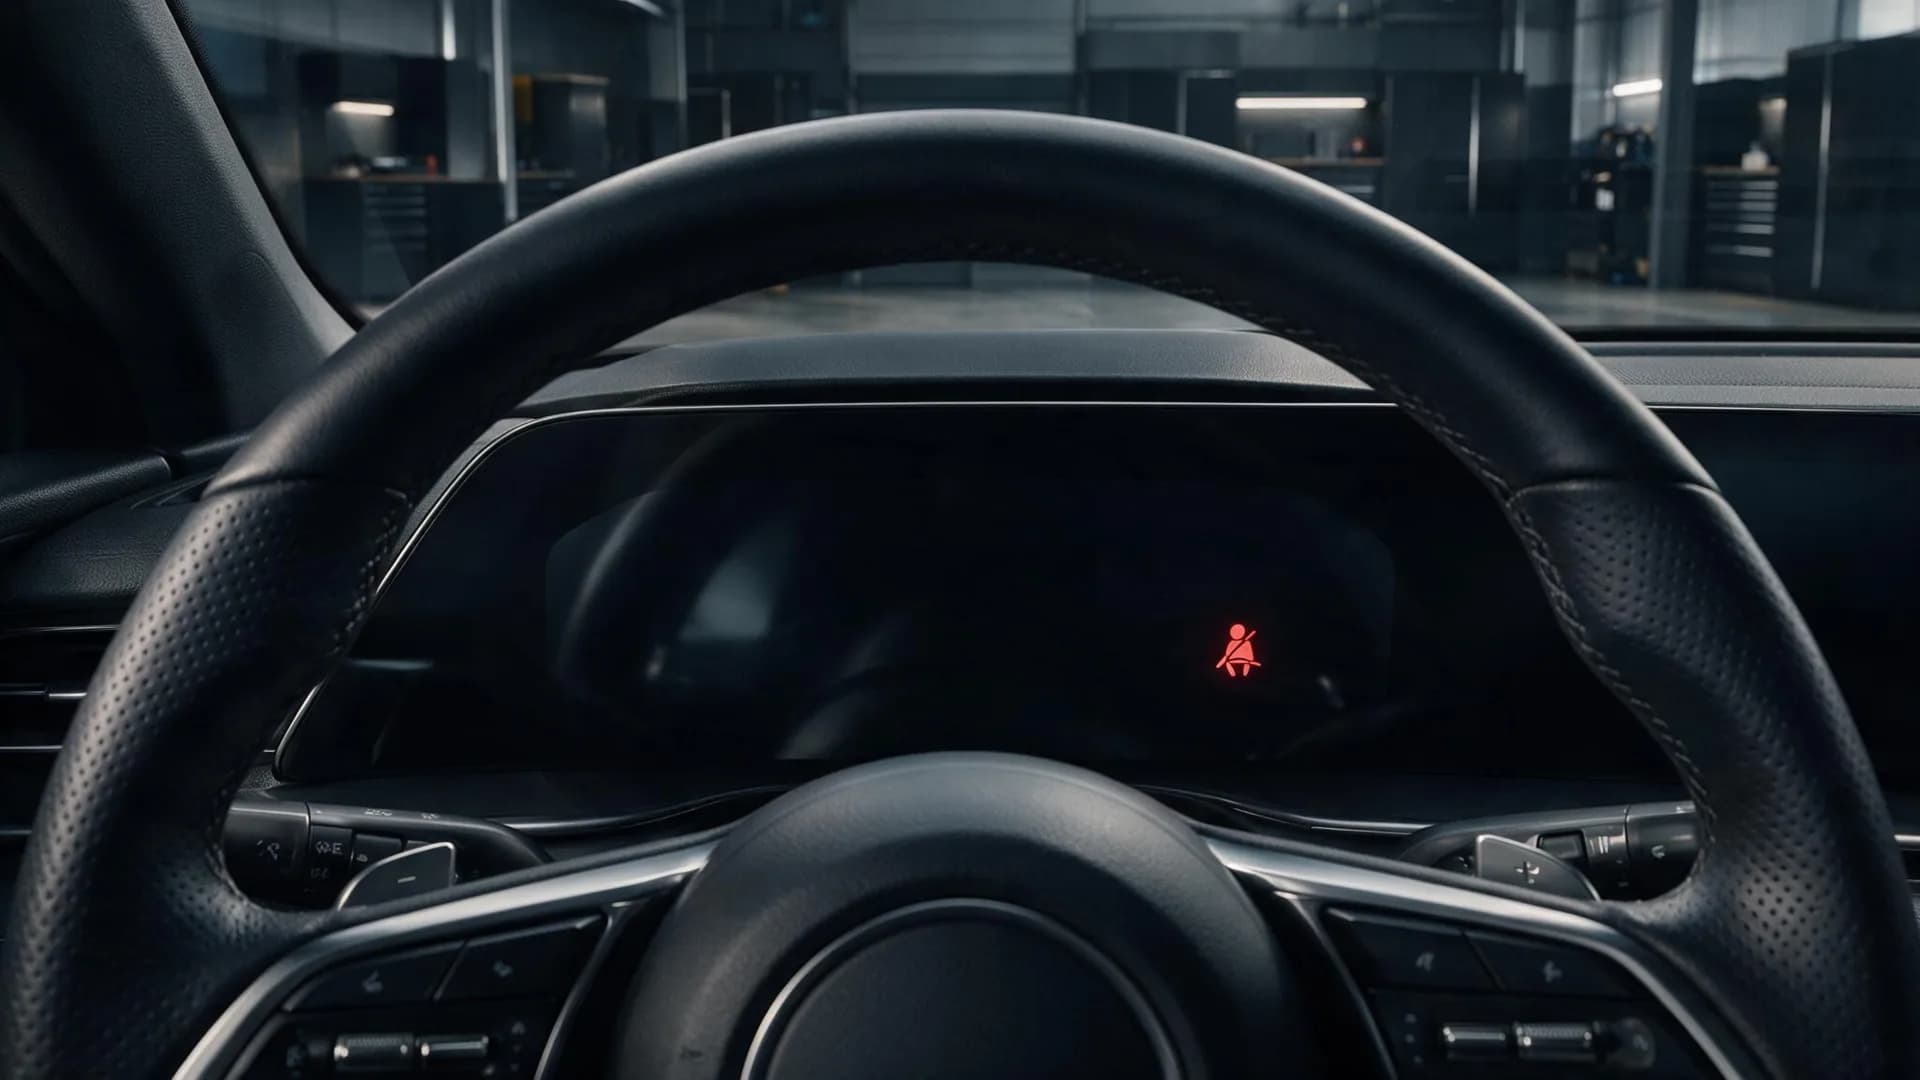
If the airbag warning light stays on, it is usually one of these three things
Only plugged in or loosely bolted
The control unit measures acceleration through its housing. If it is not seated firmly, it reports a fault. On many vehicles, the ground connection also runs through the mounting.
Connector not fully latched
A connector that is only half pushed on often makes contact on only some of the contacts. This is hard to see from the outside.
Pin bent or pushed back
During removal, transport or plugging in, a contact can bend over or slip back into the connector. Then exactly that one line is missing.
How to reinstall the control unit
Work through the steps in order. On many vehicles, the “Mounting position” tab on the product page shows where your control unit is located.
- 1
Ignition off, disconnect the battery
Switch the ignition off and remove the key. Disconnect the negative terminal of the battery and wait a few minutes before working on the airbag system.
- 2
Check connector and pins
Look at both sides: the pins on the control unit and the connector on the wiring harness in the vehicle. All pins must stand straight and protrude equally far. Look out for greenish or white deposits and for moisture.
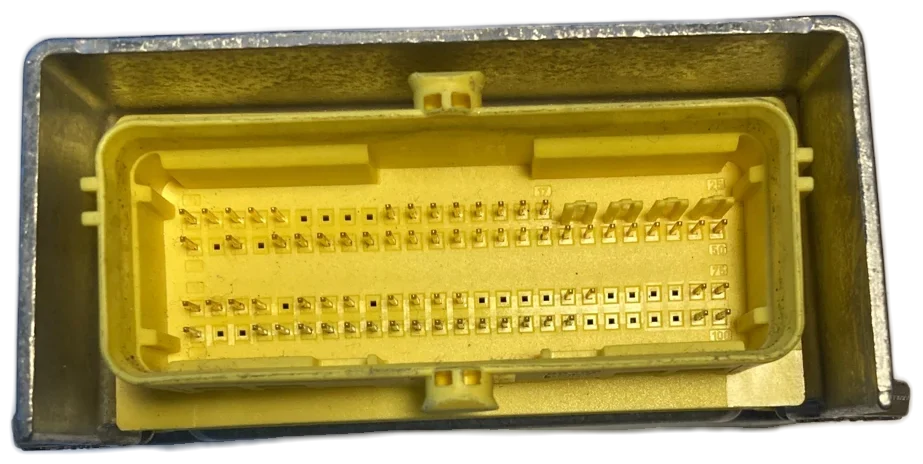
Connector socket on the control unit. This is where the pins are. How to recognize a bad pin is shown in the pictures further down: How to check the pins
- 3
Insert the unit correctly
Fit the unit exactly as it was seated before removal, and make sure it lies flat: no cable, no insulation mat and no carpet underneath.
- 4
Bolt it down with all screws
Tighten all mounting screws firmly, including those that are hard to reach. If a ground cable or ground screw belongs to the mounting, bolt it back on and make sure the contact surfaces are clean.
Then give the unit a brief shake. It must not move.
- 5
Plug in the connector until it latches
Position the connector straight and push it on without tilting it. If it has a locking lever or slider, move it all the way over. The connector is seated when it latches audibly and cannot be pulled off with a light tug.
On some vehicles it is easier to plug in the connector before bolting the unit down. What matters is that both are secure in the end.
- 6
Reconnect everything else
If you detached seats or trim panels for the removal, plug their connectors back in. Under the front seats there are usually yellow connectors for the side airbag, seat belt buckle and seat occupancy. A forgotten connector there makes the airbag warning light come on just the same.
- 7
Reconnect the battery, check the light
Make sure nobody is in the vehicle, then reconnect the battery. Switch the ignition on without leaning over the steering wheel or the dashboard.
The airbag warning light comes on briefly and goes out after a few seconds. The installation is then complete.
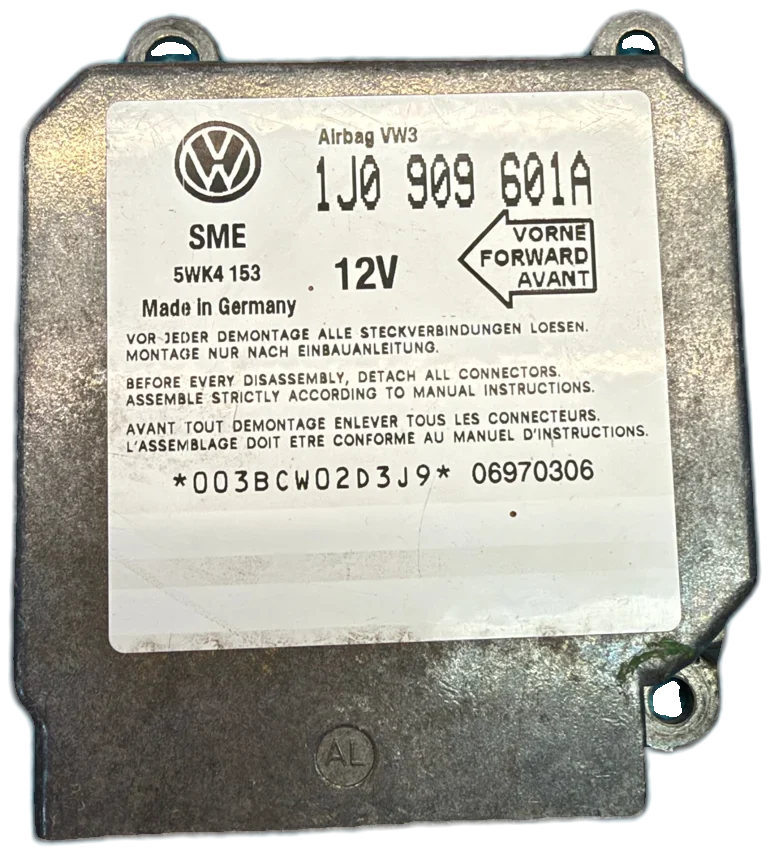
One screw at every mounting point, all tightened firmly.
How to check the pins
Look at the contacts from the side and from the front, preferably with a flashlight. A single bad pin is enough to cause a fault message.
The photos show a connector socket from our stock. The faults were added to the image afterwards for illustration.
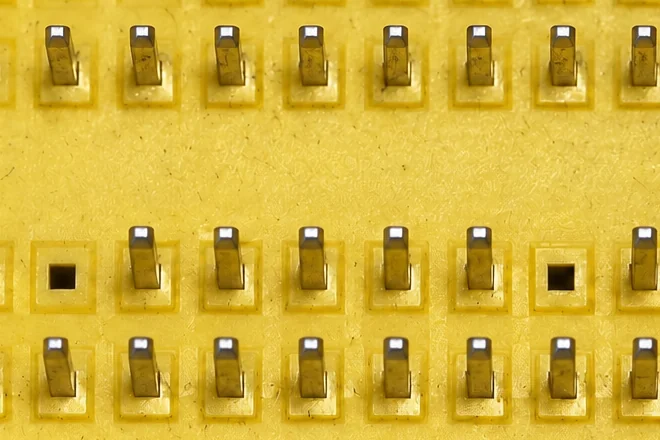
All pins stand straight, in a row and at the same height.
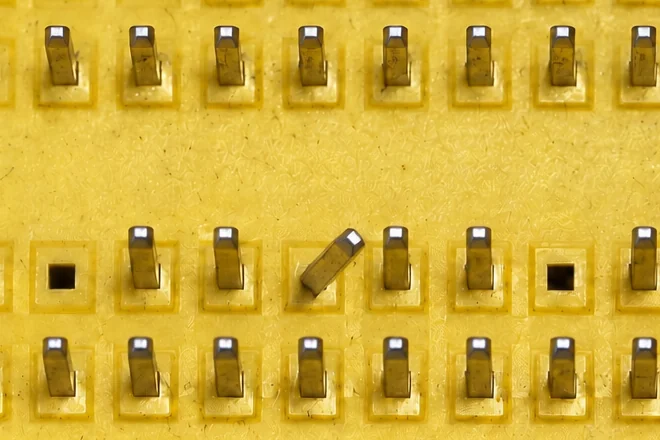
One pin is slanted or touches its neighbor. Carefully bend it straight again.
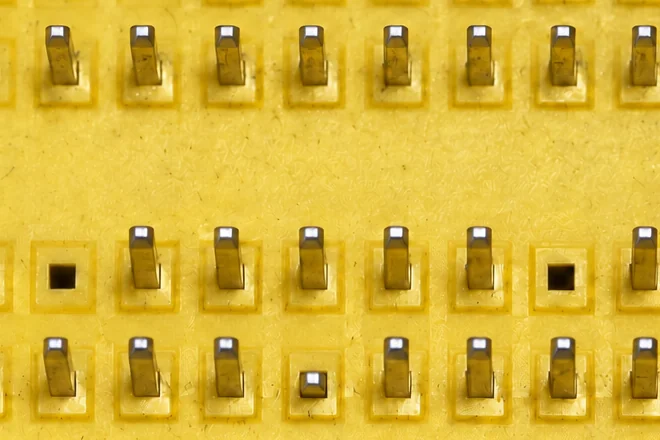
One pin sits deeper than the others. It makes no contact when the connector is plugged on.
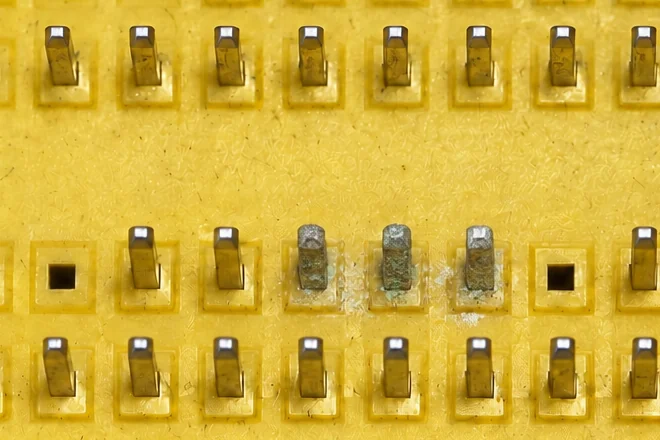
Greenish or white deposits, usually after water in the footwell.
Carefully bend it straight again, ideally with fine needle-nose pliers or tweezers and in small steps. Afterwards it must stand as straight in the row as its neighbors. If the pin breaks off or cannot be straightened, do not install the unit and send us a photo of the contacts with your repair order number.
The connector on the wiring harness contains female contacts instead of pins. If a female contact sits deeper than the others or you can see corrosion, have the connector repaired at a workshop before you connect the control unit.
Light still on?
Check once more. Ignition off, battery disconnected, then check connector, pins and screws from steps 2 to 6. Usually it is one of these.
Have the fault memory read out. The fault code shows which circuit is affected. While the control unit was removed, other control units have often stored a communication fault. These entries can be cleared after installation.
After an accident: If we have erased the crash data, it is still stored in other control units, for example in the engine control unit. If the vehicle does not start, these control units must also be unlocked.
Write to us. Send us the fault code with your repair order number. We will tell you what the cause is.
What you should avoid
Do not measure at airbag connectors with a test lamp or multimeter. The test current can trigger an airbag.
Do not just plug in the unit and leave it lying loose, not even briefly for a test.
Do not force the connector on. If it jams, it is crooked or a pin is bent.
Do not open the housing.
Questions about installation
Does the control unit have to be coded after installation?
Who is allowed to install the control unit?
How tight do the screws have to be?
A pin on the control unit is bent. What now?